Seasonal DIY Decor: Festive Touches for Every Holiday
Spring: Awakening Your Home with Freshness
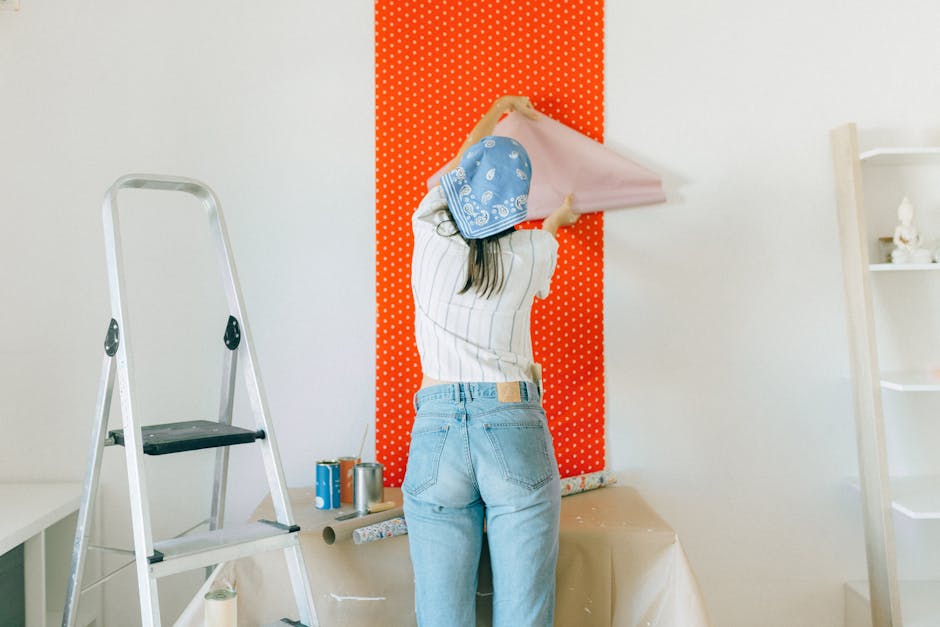
Spring heralds renewal and rebirth, making it the perfect time to infuse your home with vibrant colours and natural elements. Think beyond the usual Easter eggs and bunnies.
1. Botanical Prints and Pressed Flower Art:
- Materials: High-quality watercolour paper, pressed flowers and leaves (or fresh specimens for pressing), clear craft glue, a picture frame (upcycled or new), tweezers, a heavy book for pressing (optional if using purchased pressed flowers).
- Process: For pressing your own flowers, arrange them carefully between sheets of blotting paper within a heavy book. Weight down the book for 1-2 weeks. Once dried, gently arrange the pressed flowers onto the watercolour paper to create a visually appealing composition. Use tweezers for delicate placement. Secure the flowers with small dabs of clear craft glue. Allow to dry completely before framing.
- Variations: Use different flower types and leaf shapes to create unique patterns. Experiment with different coloured backgrounds. Consider adding hand-painted watercolour details around the pressed flowers.
- SEO Keywords: pressed flower art, botanical prints DIY, spring decor ideas, natural home decor, floral wall art, easy spring crafts.
2. Painted Mason Jar Vases:
- Materials: Mason jars (recycled), acrylic paint in pastel colours, paintbrushes, sealant (optional), sandpaper (optional for a distressed look).
- Process: Clean the mason jars thoroughly. Apply a base coat of acrylic paint, allowing it to dry completely. Add a second coat for full coverage. For a distressed look, lightly sand certain areas after the paint has dried. Seal the painted jars with a clear sealant for durability.
- Variations: Use different painting techniques, such as sponging or stippling, to create texture. Add embellishments like twine, ribbon, or lace. Create a gradient effect by blending different shades of paint.
- SEO Keywords: mason jar crafts, painted vases DIY, spring table decorations, upcycled home decor, pastel home decor, DIY flower vases.
3. DIY Moss Balls (Kokedama):
- Materials: Small plants (ferns, succulents, ivy), sphagnum moss, bonsai soil or a well-draining potting mix, twine or fishing line, water.
- Process: Gently remove the plant from its pot, shaking off excess soil. Combine the bonsai soil and potting mix. Moisten the sphagnum moss and squeeze out the excess water. Wrap the roots of the plant with the moss, forming a ball. Cover the moss ball with a layer of soil. Secure the ball by wrapping it tightly with twine or fishing line. Hang the kokedama or display it on a decorative plate. Water by soaking the moss ball in water until saturated.
- Variations: Use different types of moss for texture and colour. Add decorative stones or beads to the twine. Create a miniature hanging garden by grouping several kokedamas together.
- SEO Keywords: kokedama DIY, moss balls tutorial, hanging plants indoor, spring plant decor, Japanese moss balls, unique plant displays.
Summer: Bringing the Outdoors In
Summer’s warmth and sunshine inspire breezy and refreshing decor. Focus on light colours, natural materials, and coastal themes.
4. Seashell Wreath:
- Materials: A foam wreath form, assorted seashells (collected or purchased), hot glue gun and glue sticks, craft paint (optional for painting some shells), ribbon or twine for hanging.
- Process: If desired, paint some of the seashells with craft paint to create a cohesive colour palette. Apply hot glue to the back of each seashell and adhere it to the wreath form. Overlap the shells to create a full and textured look. Continue until the entire wreath form is covered. Attach a ribbon or twine to the back of the wreath for hanging.
- Variations: Use different sizes and types of seashells to create a unique design. Add other coastal elements, such as starfish, sand dollars, or sea glass. Incorporate a burlap ribbon for a rustic touch.
- SEO Keywords: seashell wreath DIY, coastal home decor, summer wreath ideas, beach themed crafts, DIY door wreath, ocean inspired decor.
5. Macrame Plant Hangers:
- Materials: Cotton rope or macrame cord, a metal or wooden ring, scissors, a measuring tape, a plant pot.
- Process: Cut several lengths of rope (the length will depend on the desired length of the hanger). Fold the rope in half and attach it to the ring using a larks head knot. Divide the ropes into groups of four. Tie square knots or other macrame knots to create a decorative pattern. Repeat the knots until you reach the desired length. Gather the ends of the ropes and tie them together to create a bottom knot. Place the plant pot inside the hanger.
- Variations: Use different macrame knotting techniques to create intricate patterns. Add beads or other embellishments to the hanger. Use different colours of rope for a bolder look.
- SEO Keywords: macrame plant hanger tutorial, DIY plant hanger, boho home decor, summer indoor plants, hanging planters, macrame crafts.
6. Citrus Garland:
- Materials: Fresh citrus fruits (oranges, lemons, limes), a sharp knife, parchment paper, baking sheet, twine or string, needle.
- Process: Thinly slice the citrus fruits. Place the slices on a baking sheet lined with parchment paper. Bake in a low oven (around 200°F) for several hours, or until the slices are completely dried. Allow the slices to cool completely. Use a needle to thread the dried citrus slices onto the twine or string. Hang the garland in a sunny window or on a mantel.
- Variations: Use different types of citrus fruits for a colourful garland. Add other dried fruits, such as apples or pears. Incorporate cinnamon sticks or star anise for a fragrant garland.
- SEO Keywords: citrus garland DIY, dried fruit decor, summer home decor, natural garland, kitchen decor ideas, DIY summer crafts.
Autumn: Embracing Warmth and Harvest Hues
Autumn invites us to bring the cosy colours of nature indoors. Focus on rich reds, oranges, yellows, and browns, along with natural textures.
7. Leaf Garland:
- Materials: Fallen leaves (various colours and sizes), twine or string, hot glue gun and glue sticks (optional), sealant spray (optional).
- Process: Gather fallen leaves and dry them completely (pressing them between book pages works well). If desired, spray the leaves with a sealant to preserve them. Thread the leaves onto the twine or string, either by piercing them with a needle or by using a hot glue gun to attach them. Space the leaves evenly or create clusters for visual interest.
- Variations: Use different types of leaves to create a textured garland. Add acorns, pinecones, or berries. Incorporate fairy lights for a warm and inviting glow.
- SEO Keywords: leaf garland DIY, autumn decor ideas, fall garland tutorial, natural home decor, Thanksgiving decor, seasonal crafts.
8. Pumpkin Vase Centrepiece:
- Materials: A pumpkin (real or artificial), a knife or pumpkin carving kit, a vase or jar that fits inside the pumpkin, floral foam, assorted fall flowers and foliage.
- Process: If using a real pumpkin, cut off the top and scoop out the seeds and pulp. Insert the vase or jar into the pumpkin. Place floral foam inside the vase. Arrange the flowers and foliage in the floral foam to create a beautiful centrepiece.
- Variations: Use different sizes and shapes of pumpkins. Paint the pumpkin with metallic paint or add embellishments. Use different types of flowers and foliage to create a unique arrangement.
- SEO Keywords: pumpkin vase centrepiece, fall flower arrangements, Thanksgiving table decor, autumn centrepiece ideas, DIY floral arrangements, pumpkin decor.
9. Pinecone Fire Starters:
- Materials: Pinecones (dried), soy wax flakes, crayons (optional for colour), twine or jute, small saucepan or double boiler, muffin tin, silicone muffin liners.
- Process: Melt the soy wax flakes in a small saucepan or double boiler over low heat. If desired, add crayon shavings for colour. Pour the melted wax into the silicone muffin liners, filling them about halfway. Place a pinecone in each liner, ensuring the bottom is submerged in the wax. Allow the wax to cool and harden completely. Remove the pinecone fire starters from the liners. Tie twine or jute around the pinecones for a rustic touch.
- Variations: Add essential oils, such as cinnamon or clove, to the wax for a fragrant fire starter. Incorporate dried herbs, such as rosemary or lavender, into the wax. Use different types of pinecones for variety.
- SEO Keywords: pinecone fire starters DIY, homemade fire starters, autumn crafts, camping crafts, survival crafts, DIY gifts.
Winter: Creating a Cozy and Festive Atmosphere
Winter brings a desire for warmth, comfort, and holiday cheer. Focus on soft textures, shimmering accents, and festive colours.
10. Salt Dough Ornaments:
- Materials: Flour, salt, water, rolling pin, cookie cutters (holiday shapes), baking sheet, parchment paper, acrylic paint, glitter, ribbon or twine.
- Process: Combine flour and salt in a bowl. Gradually add water until a dough forms. Roll out the dough and use cookie cutters to cut out shapes. Place the ornaments on a baking sheet lined with parchment paper. Bake in a low oven (around 250°F) until hard. Allow to cool completely. Paint the ornaments with acrylic paint and add glitter. Attach ribbon or twine for hanging.
- Variations: Use different cookie cutter shapes. Add food colouring to the dough for coloured ornaments. Decorate with beads, sequins, or other embellishments.
- SEO Keywords: salt dough ornaments DIY, Christmas ornaments homemade, holiday crafts for kids, DIY Christmas decorations, salt dough recipe, winter crafts.
11. Snowflake Window Clings:
- Materials: Clear craft glue, glitter (white or iridescent), template for snowflakes (printed or drawn), plastic sheet protector.
- Process: Place the snowflake template inside the plastic sheet protector. Trace the snowflake outline with clear craft glue. Sprinkle glitter generously over the glue. Allow the glue to dry completely. Peel the snowflake cling from the sheet protector and adhere it to a window.
- Variations: Use different colours of glitter. Create different snowflake designs. Add small beads or sequins to the glue.
- SEO Keywords: snowflake window clings DIY, winter window decor, Christmas window decor, DIY Christmas decorations, easy winter crafts, kids Christmas crafts.
12. Cinnamon Stick Candles:
- Materials: Pillar candles (various sizes), cinnamon sticks, hot glue gun and glue sticks, ribbon or twine.
- Process: Apply a small amount of hot glue to the back of each cinnamon stick and adhere it to the pillar candle. Continue until the entire candle is covered. Tie ribbon or twine around the candle to secure the cinnamon sticks and add a decorative touch.
- Variations: Use different sizes and thicknesses of cinnamon sticks. Add other spices, such as star anise or cloves. Use different colours of ribbon or twine.
- SEO Keywords: cinnamon stick candles DIY, Christmas candle decor, winter candle decor, fragrant candles, homemade gifts, DIY holiday decor.